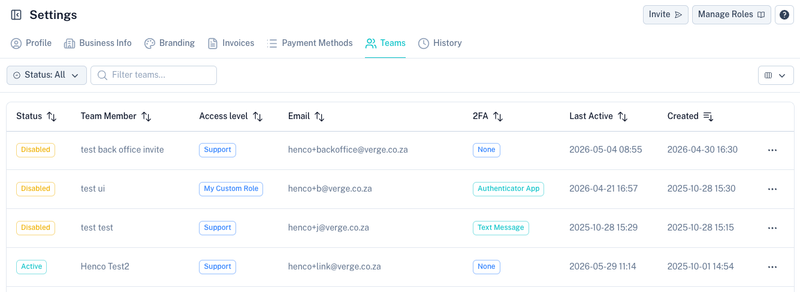
Teams
The Teams section allows you to invite additional users to your account and control what they can access within the platform.
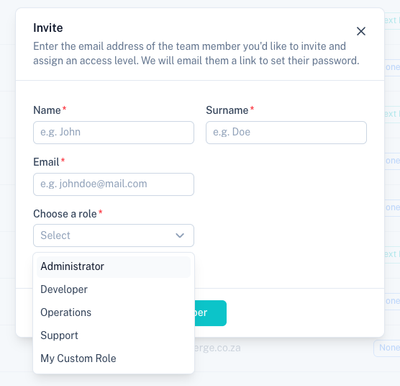
Inviting a Team Member
Click Invite Team Member to add a new user to your account.

Complete the invitation form and send the invitation.
Invitation Process
When a team member is invited:
- An email invitation is sent to the user's email address.
- The user must open the invitation link.
- The user accepts the invitation.
- The user creates their own password.
- The user signs in to the platform.
Once completed, the user will have access according to the role assigned to them.
Managing Roles
Roles determine which areas of the platform a user can access.
Click Manage Roles to create and maintain custom roles.

Viewing Roles
The Roles screen displays all available roles within your account.
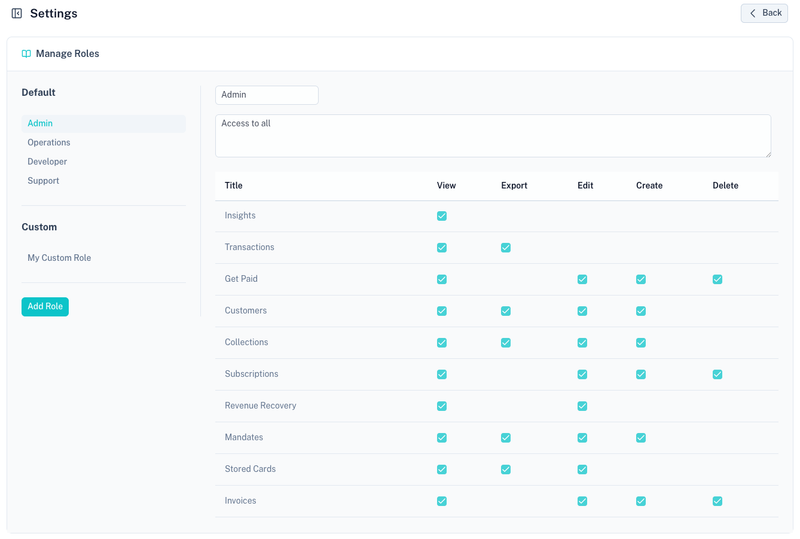
From here you can:
- View existing roles
- Edit role permissions
- Create new roles
- Assign roles to team members
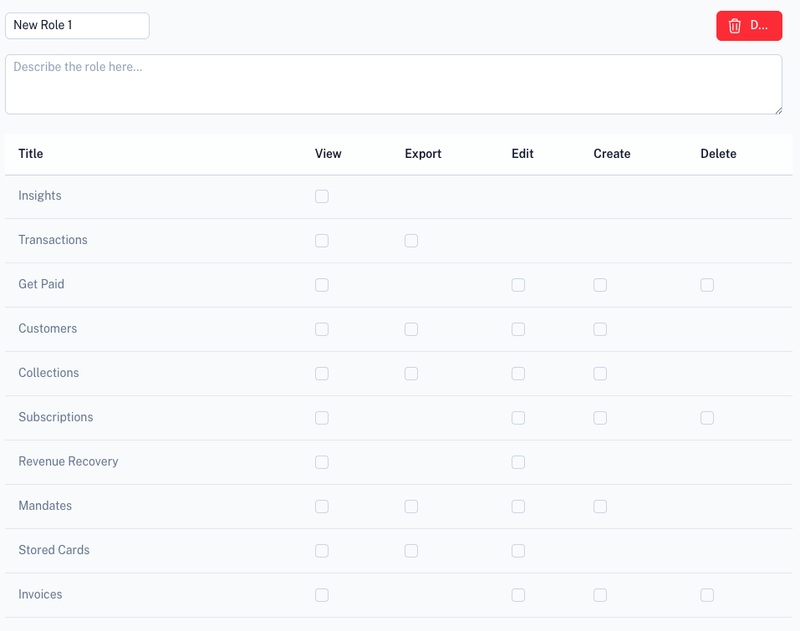
Creating a Role
Click Add Role to create a new role.

Provide:
- Role name
- Description (if applicable)
After creating the role, configure the permissions that users assigned to the role will receive.
Permissions allow you to control access to:
- Dashboard information
- Customers
- Collections
- Transactions
- Invoices
- Payment methods
- Settings
- Other platform features
Two-Factor Authentication (2FA)
After accepting their invitation and signing in, team members can enable Two-Factor Authentication (2FA) from their own profile.
See:
Available options include:
- Authenticator App
- SMS Verification
Enabling 2FA is strongly recommended for all users with account access.
Tips
- Assign users the minimum permissions required for their role.
- Regularly review team member access.
- Remove access for users who no longer require it.
- Encourage all users to enable 2FA.
- Use separate roles for administrators, finance users and support staff where appropriate.